
If you needed a free way to distribute and test your app in the past, testflightapp.com was the place. Is the new TestFlight still the place?
While there are other great alternatives, like Hockey App, it isn’t a perfect solution for those who can’t add a recurring expense to their development cycle. That’s just not an option for plenty of people out there. While there are a few other free alternatives, I’ve really enjoyed my time with Beta by Crashlytics. That said, Apple will shut down the old TestFlight and encourage everyone to move to the new experience under iTunes Connect on February 26th, 2015. To prepare you for that this post will dive into the TestFlight experience so you can determine if it is something you’d like to pursue, or if Crashlytics or Hockey App is where you should go. By the time you finish this article you’ll have a pretty good idea which road to take.
- You’ll understand what makes these services different
- You’ll walk through the TestFlight experience with me as I deploy a test build of my weekend project, Tomorrow
- You’ll get try the first part of Tomorrow, joining my TestFlight beta testing group
Comparing Services
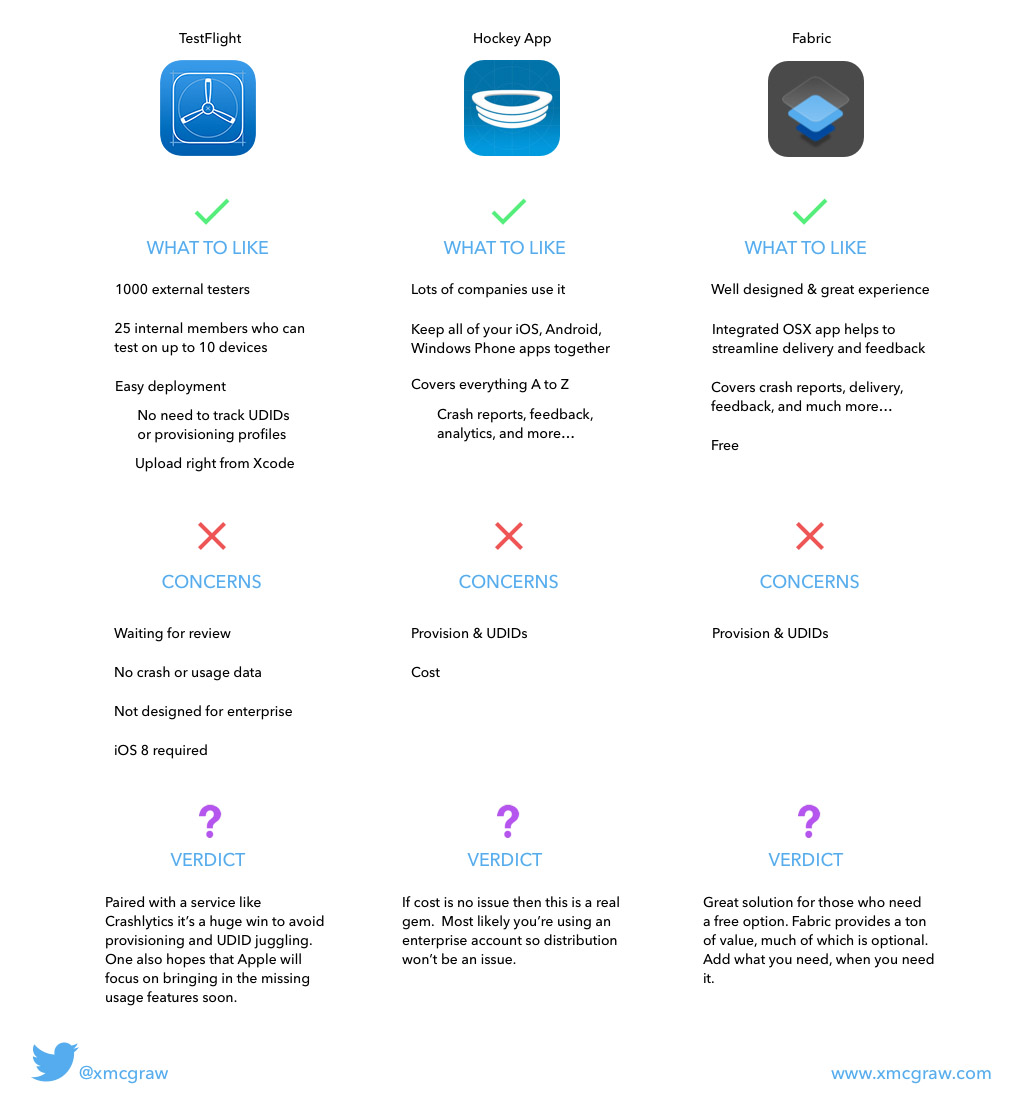
Right now we’ve got 3 services high on the radar.
Here is a high-level overview of my thoughts on these services.
Test The Experience
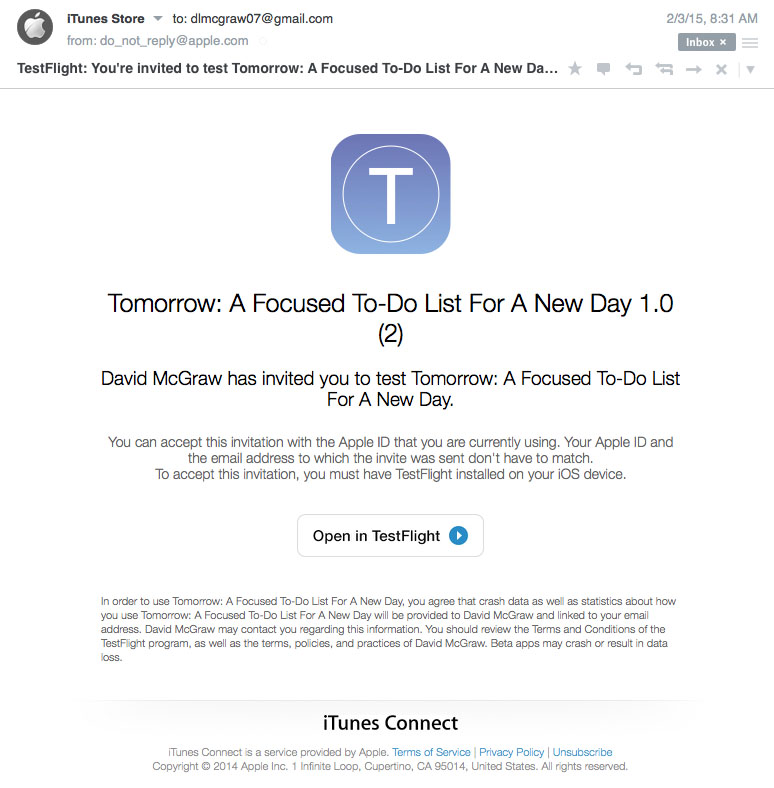
Has anyone sent you a TestFlight build from the new iTunes Connect? Well, here is your chance to walk through the experience of downloading, providing feedback, and feeling how the process works.
For a quick backstory, Tomorrow is an app I’m building as a way to just have fun beyond the serious stuff. It’s purpose is deviously simple—to help you manage the massive task list you are working with. I will share more about this entire process in a future article!
If you are on my Discover iOS Letter you should have my e-mail. Toss me one and I’ll add you to the beta so you can check things out from an end-user perspective. If you’re not on the list, consider subscribing.
Preparing For Upload
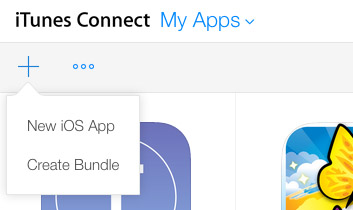
First you’re going to need to make sure that you have an app created in iTunes Connect with the bundle id of your app. If you have yet to generate provisions for your app you’ll want to do that first. Once you have the provisions jump into iTunes Connect and add a New iOS App.
You’ll then need to fill out all the important details. Your bundle id should match the id you’ve used in your provisions.
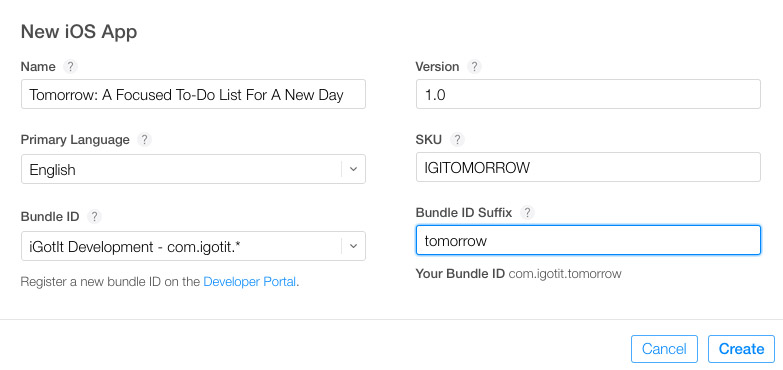
Once you have the app created you’re ready to start testing. You don’t need to fill out any of the app details right now (screenshots, description, etc).
Uploading A Build
When you’re ready to upload a build be sure that your provisions are set properly for release. If you open your app target, select Build Settings, and navigate to the Code Signing Identity area you should see the provision you’ve created that matches your bundle id.
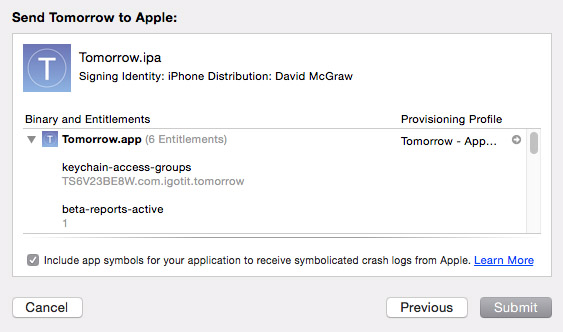
Once you archive your app you can click Submit in the organizer that pops up (Window > Organizer). Choose your team. And, before you submit, verify that Xcode pulled in the provision you expected. The first few times I tried this Xcode didn’t find the right one. If you go to Xcode > Preferences > Accounts, you can double-click your team and refresh your provisions.
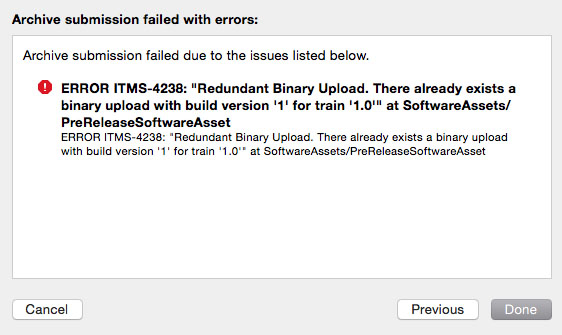
You also need to make sure that your iOS Deployment Target is not set to a beta version of iOS.
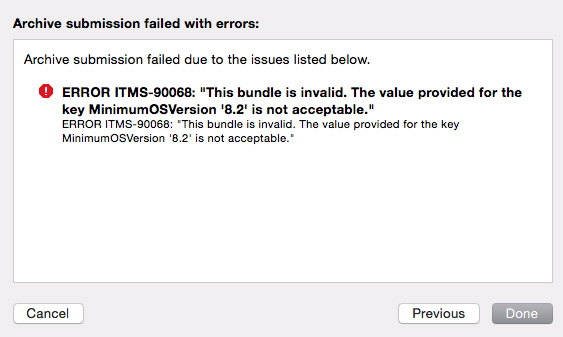
Unlike the old TestFlight, which would just add #x if build/version were the same, you also have to make sure you update them in the new TestFlight. You’ll see this great looking error if you don’t.
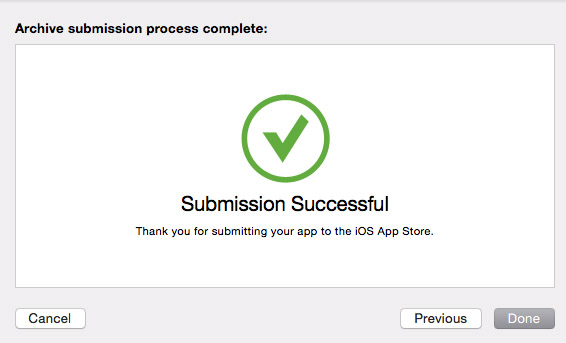
If the provisions are correct, and the two errors above are not hit, you should be good to go!
Enable TestFlight & Invite Testers
Once your build is uploaded you should now see it listed under the Prerelease tab in iTunes Connect. It’ll take a few minutes to go through Processing.

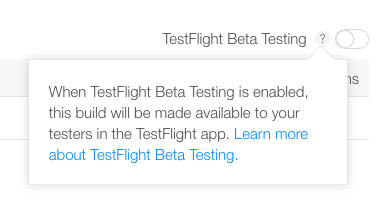
You’ll need to turn TestFlight Beta Testing on before a build will be available.
Once the processing is completed your build will be available.
Wait… a triangle? That doesn’t look good. And Submit For Beta App Review is disabled…
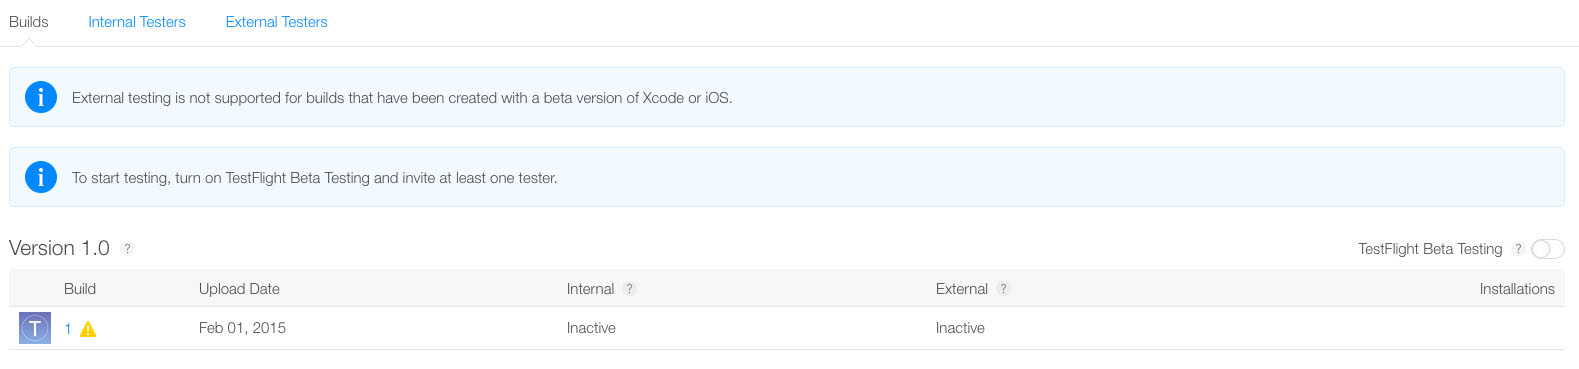
There you have it. If you’ve uploaded a build with a beta version of Xcode you can’t distribute builds externally. You’ll be locked to you own team (25 members). In this case I just created a build from the non-beta Xcode and uploaded it again. I didn’t have anything that required that I used the beta version.
Begin External Testing
Once you’re ready for external testing you’ll need to fill out a few details and then you’ll be ready to add people to the test. Until then you’ll have to wait for the Apple review team to work their magic.

In this test it took less than a business day to get it approved. The only thing that was active in the build was the onboarding experience. Thankfully they didn’t reject the build for that…
Once approved, you can invite individuals under the External Testers tab.

Test Feedback
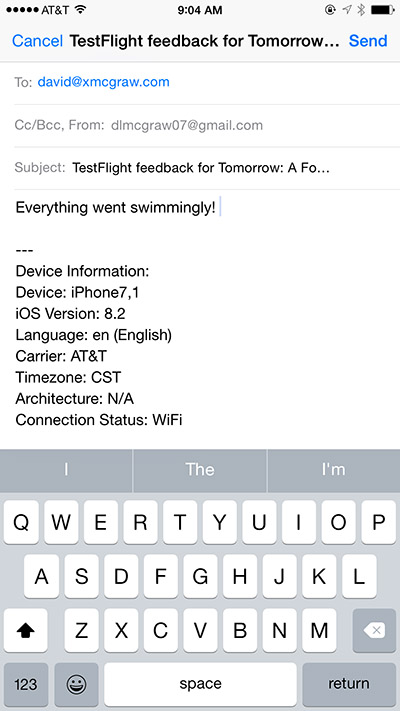
The TestFlight app makes it easy to let the tester know what to test. Additionally, they can quickly send feedback from the app as well.
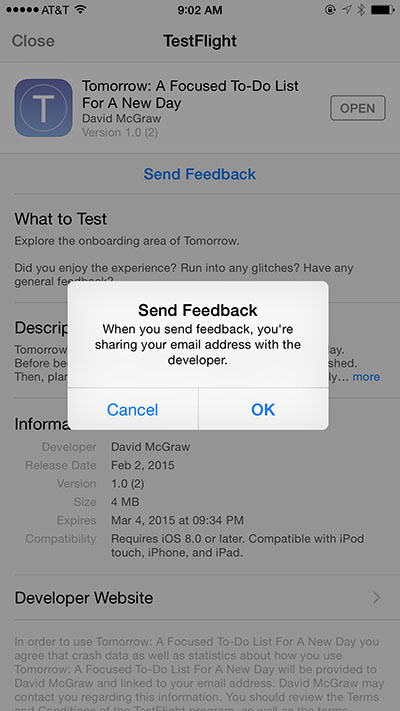
The app will automatically include device information to the e-mail.
Crash Reports
I purposely added a selector crash to the build so I could see what happens when the app crashed. Yeah, they don’t provide a way to view them in TestFlight yet. It’s nowhere to be found, including under the Versions details.
That’s unfortunate, but not all is lost. You can still take advantage of TestFlights extremely painless invite system while leveraging Crashlytics for reporting.
Questions
[alert color=”blue”]What if I have an enterprise developer account?[/alert]
If you’re using an enterprise account you can’t distribute apps to the app store. Well, Apple has also made it clear that TestFlight is not for enterprise accounts.
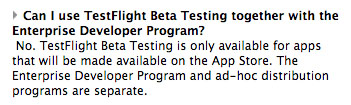
This is a bit of an annoyance for those of you who may be using your enterprise account as a way to glide past restrictions. Apple clearly wants you to be using internal distribution methods.
[alert color=”blue”]How long does it take for subsequent builds?[/alert]
From what I’ve seen this takes about 30 minutes.
Takeaway
At this point the real value in TestFlight comes from the invite system. Having the ability to bring in 1000 testers by simply requesting an e-mail address is fantastic. Adding Crashlytics is a breeze, and the experience is really nice. But if you don’t mind paying a bit, Hockey App is where you want to go. If you want a full suite of tools, for free, give Fabric a spin.
Having to wait even 30 minutes to kick a build to external testers is slightly annoying, but I don’t think it’s enough to keep me away. If anything keeps me away it’s the lack of usage data.
Thanks for reading. If you’ve enjoyed this content learn about my monthly Discover iOS Letter!
Best wishes for a productive day!
Leave a Reply