
A vast majority of the apps you see on the store today are being powered by the cloud. Instagram is storing photos in the cloud. Facebook is managing all your data there. So is Reddit, Twitter, Amazon, and any other app that you can think of. That’s probably why you’re here. You’ve discovered that to move forward you need to learn how to build a backend that can keeps data synced across devices.
To Build or Not
Maybe you’re still debating on which path to run. Should you build a custom web app? Should you use a provider like Parse?
Roll Custom
- You’ve discovered that you need a highly customized backend service
- Your app may have an incredibly high amount of requests (like a chat app)
- You don’t feel comfortable sacrificing the chances of downtime (this may not be a huge issue these days)
- You don’t want a middle man adding arbitrary limits on your requests
Roll With Parse
- You’re learning how to build iOS apps (focus on iOS first, don’t learn many things at once)
- You want something running as soon as possible to prove a concept (prototype)
- You don’t have a lot of extravagant needs (just storing basic data types into a database)
- You have little-to-no desire to build and manage a web service
Developers have built over 500,000 apps on Parse and it continues to grow. When you’re learning how to build apps for iOS, Parse can be a valuable asset, but be aware that the solution may not be a solution forever. At the end of the day Parse does have limitations and will not provide all the control some may need. But, it can be a great way to prototype an idea, support a small app, manage push notifications, and even expose you to backend challenges.
If you’re looking for a few more thoughts, you should read this weeks question post When To Choose an iOS Backend Provider or Build Custom.
So let’s see what it takes to get an application built using Parse.
Getting Rolling
In this example we’ll be building our own little version of a recently released photo sharing app called Tiiny. If you haven’t downloaded the app yet go check it out! It’s a great, no-pressure, way to share photos with followers. The photos will be small squares so you don’t have to worry about the details of the photos. You just snap and go.
If you’ve never worked with the camera before, go check out a recent tutorial Learn how to create a custom camera on iOS.
The Application
Since this tutorial is about Parse I will skip explaining all the design and layout process that’s required. I just want you focused on Parse. To continue you’ll want to clone a copy of the repository. While it may appear that the app is functional, everything is happening at the local level. We’re not sending or fetching anything from Parse. In fact, Parse isn’t even added to the project. I’m going to let you do that!
This brings up an important developer point of view here. It’s important to build your app without relying on a backend implementation. There are a few reasons for this:
- You’ll be able to quickly interact with the feature without investing time into building the server component(s)
- You avoid chasing unnecessary bugs if your web service is failing somewhere
- If the server goes down you can still interact with your app to test functionality and implement features
Introducing Parse
Creating Your Account
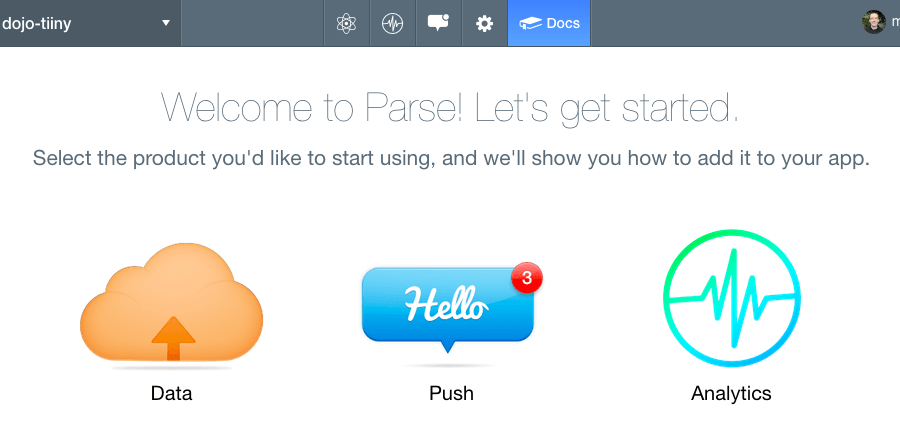
To create your account you’re going to want to run over to Parse.com. I used my Github credentials as an individual developer to register. You know you’ve made it when you see the following screen.
Adding Parse to Your iOS Project
Now that we have an account it’s time to add parse to our project. If you haven’t done it already, clone the repository.
Once you have the project navigate to the base folder and open the example. To add the Parse SDK to your project you can follow the Install the SDK instructions provided in the documentation
Come back to this example when you reach ‘Connect your app to Parse’
To add Parse we’re going to need to create a bridged header. That allows us to bring in code that has been built with Objective-C. Don’t worry, you will still interact with everything through Swift. The quickest way to do that is to select File > New > File. Create a Cocoa Touch file and be sure to have Objective-C set as the language. What you name the file isn’t important. When you save it you should see the dialog below. Select Yes.
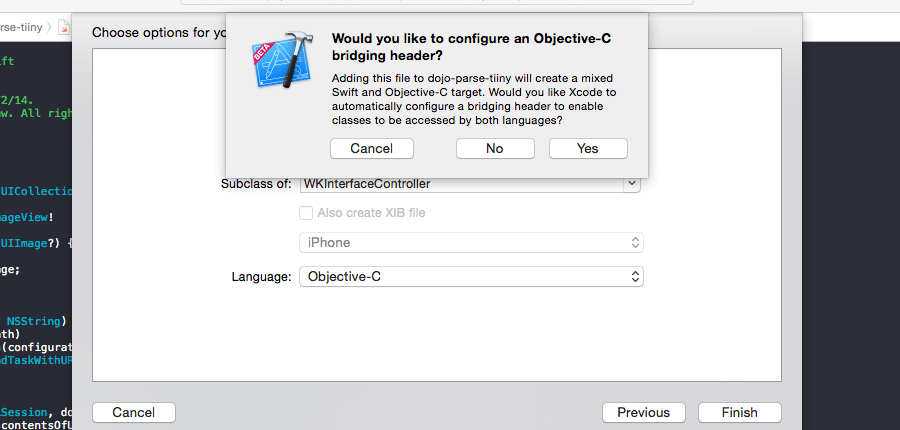
You should see the file dojo-parse-tiiny-Bridging-Header.h, along with two more files. Keep the bridging header and delete the other two files. Behind the scenes this process automatically creates the appropriate build settings for your project. Once you get the basics down you can explore how Xcode manages that in the build settings.
Now go back to the bridged header file and add the following import statement.
#import <Parse/Parse.h>
It’s time to activate Parse! Navigate to the main application delegate within AppDelegate.swift. You’re going to call the following line with your own keys. You can find those keys under the ‘Connect your app to Parse‘ section.
func application(application: UIApplication, didFinishLaunchingWithOptions launchOptions: [NSObject: AnyObject]?) -> Bool {
    // Override point for customization after application launch.

    Parse.setApplicationId("your application id here", clientKey: "your client key here")

    return true
}
Next we’ll add a little code to test that things are working.
var test = PFObject(className: "TestObject")
test["customer"] = "David"
test.save()
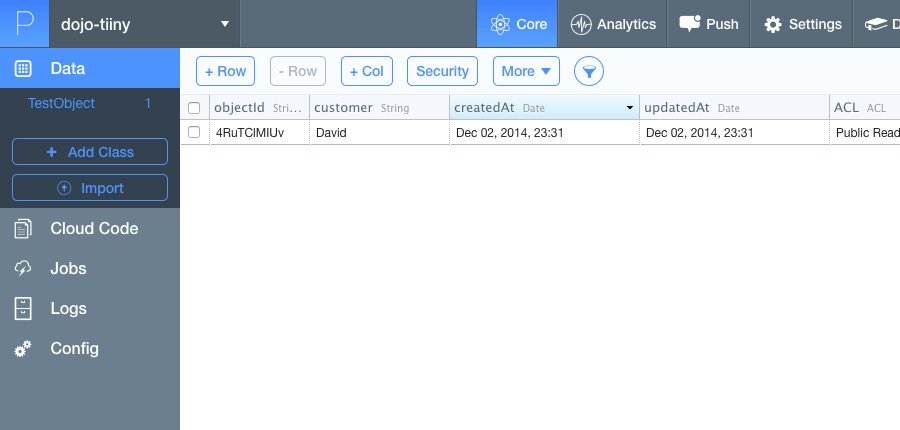
Build and run the app. Once it has launched click on the ‘Core’ tab within Parse. You should see that a new table, TestObject along with your first entry. Note that the object includes a few standard columns and includes the customer we added above.
Once you’ve confirmed that Parse is working go ahead and select More > Drop Class then type in TestObject. You can go ahead and remove that test PFObject from the source code.
Photo Class
Lets create the class that we’ll be interacting with in our app. Select ‘+ Add Class’ from the Parse Core dashboard.
Create a custom class with the name XMCPhoto.
Now lets add a new column to XMCPhoto. Select ‘+ Col’, select File, and give it the name ‘image’
That should do it! Let’s go back to Xcode.
Photo Functionality
Navigate to the takePhoto method within XMCTiinyViewController.swift.
Here we’re going to create a PFFile object that’ll allow us to upload our image file. We’ll then use that to create an XMCPhoto entry.
@IBAction func takePhoto(sender: AnyObject) {
    cameraCellReference?.captureFrame { (image) -> Void in
        if let still = image {

            // assume success so that the user will not encounter more lag than needed
            self.images.addObject(still)
            self.photoCollectionView.insertItemsAtIndexPaths([NSIndexPath(forRow: 1, inSection: 0)])

            // send the image to parse
            var file: PFFile = PFFile(data: UIImageJPEGRepresentation(still, 0.7))
            file.saveInBackgroundWithBlock({ (success, fileError) -> Void in
                if success {
                    var object: PFObject = PFObject(className: "XMCPhoto")
                    object["image"] = file
                    object.saveInBackgroundWithBlock({ (success, objError) -> Void in
                        if success {
                            println("Photo object saved")
                        } else {
                            println("Unable to create a photo object: \(objError)")
                        }
                    })
                } else {
                    println("Unable to save file: \(fileError)")
                }
            })

            /*  NOTE: in the event that the code above fails, you want to revert
                our photo addition and then alert the user.

                OR, create an upload manager that will retry the upload attempt.
             */
        }
    }
}
Build and run the app. When it launches, capture a photo and visit the Parse Core dashboard to verify that the photo was uploaded.
Refresh Layout
Now that we know we’re saving photos we can turn our attention to refreshing our view. To do that we’re going to have to use a new Parse object called PFQuery. PFQuery will find objects based on the criteria we set. Since we are not doing anything fancy we request all of the XMCPhoto objects.
func refreshLayout() {
    let query = PFQuery(className: "XMCPhoto")
    query.findObjectsInBackgroundWithBlock { (objects, error) -> Void in
        // jump back to the background process the results
        dispatch_async(dispatch_get_global_queue(DISPATCH_QUEUE_PRIORITY_DEFAULT, 0)) {
            for (index, value) in enumerate(objects) {
                let photoObj = value as PFObject
                let image: PFFile = photoObj["image"] as PFFile
                let imageData = image.getData()

                // be sure to send the results back to our main thread
                dispatch_async(dispatch_get_main_queue()) {
                    self.images.addObject(UIImage(data: imageData)!)
                }
            }

            // refresh the collection
            dispatch_async(dispatch_get_main_queue()) {
                self.photoCollectionView.reloadData()
            }
        }
    }
}
If you build and run the app you’ll begin to see the photos fall in place as you capture new photos.
We have a functioning prototype! Way to go!
Challenge
Now for a friendly challenge. In Tiiny a user can double-tap on a photo to like it. Let’s add that feature! I’ve already added the gesture so you need to figure out how to do a few things:
- Change your Parse class to hold a count of ‘likes’
- Record likes when the user double taps a photo
- Add a label to the photo cell that can display the current value
- Refresh those values when you query for XMCPhoto objects
[alert color=”yellow”]github.com project[/alert]
Question & Answer
No questions! Jump into the comments below if you run into any trouble or questions.
Takeaway
As you can see you do not need to invest a lot of time to add a cloud component to your app. If you have an idea and want to build a quick prototype it makes total sense to run with a solution like Parse. The entire goal of a prototype is to prove something works as you expect–preferably quickly. There’s no reason to waste time on unnecessary things while you’re exploring.
There is much, much more to Parse than what I’ve covered, but this should give you a nice introduction to the platform. I plan on exploring more of Parse in the future so stay tuned!
Your Turn
I hope you found this example useful! Please send any feedback my way—I’d appreciate it!
P.S
My first guide is complete. Subscribe today to get it for free or click here to learn more about my newsletter.
Leave a Reply