Back in early 2014 I had an opportunity to work on my first hardware project that went into production.
The project was incredibly interesting. All of a sudden I had to build an app that interfaced with a piece of hardware that triggered set events. Those events would be customizable through the app. It’s one thing to build an app just for the device. To create an app that interfaced with an external device was a welcome change of scenery.
Given that we are all shifting into what’s being called “The Internet Of Things,” it’s well worth your time to explore the hardware side of the house. I didn’t have the luxury of HomeKit to leverage when I worked on my hardware project. I wish I did. One of the roughest aspects of that contract was establishing a communication layer that worked well. The company I worked for had to create their own standard, which involved a lot of trial and error.
Well, HomeKit is here to help guide new hardware projects. I can’t speak for the hardware development side of the house, but I can speak to the software side. If you want to build an app for a HomeKit enabled device, or you’re just curious, then this article is for you.
- You’ll learn how HomeKit works at the foundation
- You’ll discover how to create your own accessories to experiment with
- You’ll explore an app that creates a solid foundation to work from
Introducing HomeKit
HomeKit provides a common protocol that home automation devices can adhere to, making the life of the software developer much easier. Since the hardware creator follows such a protocol you really don’t have to concern yourself with the firmware of the device. You can use HomeKit to easily configure and communicate with supported devices.
There are three major functions that HomeKit provides:
Device Discovery
Anyone who has built an iOS app for a piece of hardware can tell you many horror stories about device discovery. You’re always on the edge of what is acceptable. Is Apple going to care if I scan the network for Mac Addresses? What about wireless signals? HomeKit handles all of this for you. Even better is that they add discovered accessories to a persistent, cross-device home configuration database. So the accessory you set up on your iPhone could instantly show up on your iPad.
Configurability
HomeKit provides very easy access to the information related to your accessories. This makes it nearly trivial to display, edit, and respond to the data from the accessory.
Communication
Since HomeKit establishes a clear protocol you don’t have to worry about how the communication is sent to the device or confirming that the device even received it. You avoid a lot of low-level headaches that interfacing with hardware can bring. Stability can easily falter without a standard communication protocol. This was probably the worst part of the contract I worked on.
Finally, the configuration database is not only available to third-party apps, it’s also available to Siri. This lets you operate very sophisticated operations with voice control.
Home Configuration
Before you can get started with HomeKit it pays to understand a few ways you can configure accessories. It’s unlikely that you will impose your will by dictating how the configuration process happens. Most likely you’ll leverage the following as a way to help the customer better define their own experiences.
HMHome: Say you have a customer with a primary residence and a vacation home. Allowing them to group accessories under a given home will help them organize each area.
HMRoom: A home can have several rooms. While this is an optional part of your home, you can provide the customer with a way to better organize the area of their home. If you don’t create any rooms a default room will be provided. All of the new accessories simply attach to it.
HMAccessory: These are installed into homes and assigned to rooms. Think of these as your physical automation device, such as a light bulb. Again, if you don’t create any rooms new accessories will be assigned to a a default room.
HMService: Accessories provide user-controllable services, like a light. Accessories can have many services. So a fancy light bulb could have a service that turns it on or off and a different service that turns it blue.
Zones: These are optional groupings of rooms in a home. For example, grouping all of the lights in your basement under a zone allows you to control the entire zone with a single service.
It’s important to note that meaningful names enable commands like, “Siri, turn on the kitchen lights.” Or if you have a zone downstairs, “Siri, turn off all of the lights downstairs.”
Example Walkthrough
In this example we’re going to walk through an example that will give you a clear window into how HomeKit functions. Building apps for hardware products can be really fun. HomeKit makes the process much more enjoyable.
[alert color=”yellow”]Follow along by downloading the source from Github[/alert]
The Hardware
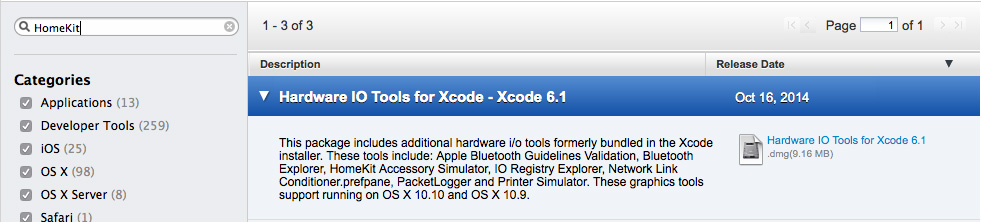
I’m guessing that you don’t have a HomeKit supported device handy. Not to worry. Apple provides a simulator that lets us build our own accessory to interface with. The simulator does not come with Xcode so you’ll have to navigate to Apple’s download center to get the Hardware IO Tools for Xcode. Search for HomeKit.
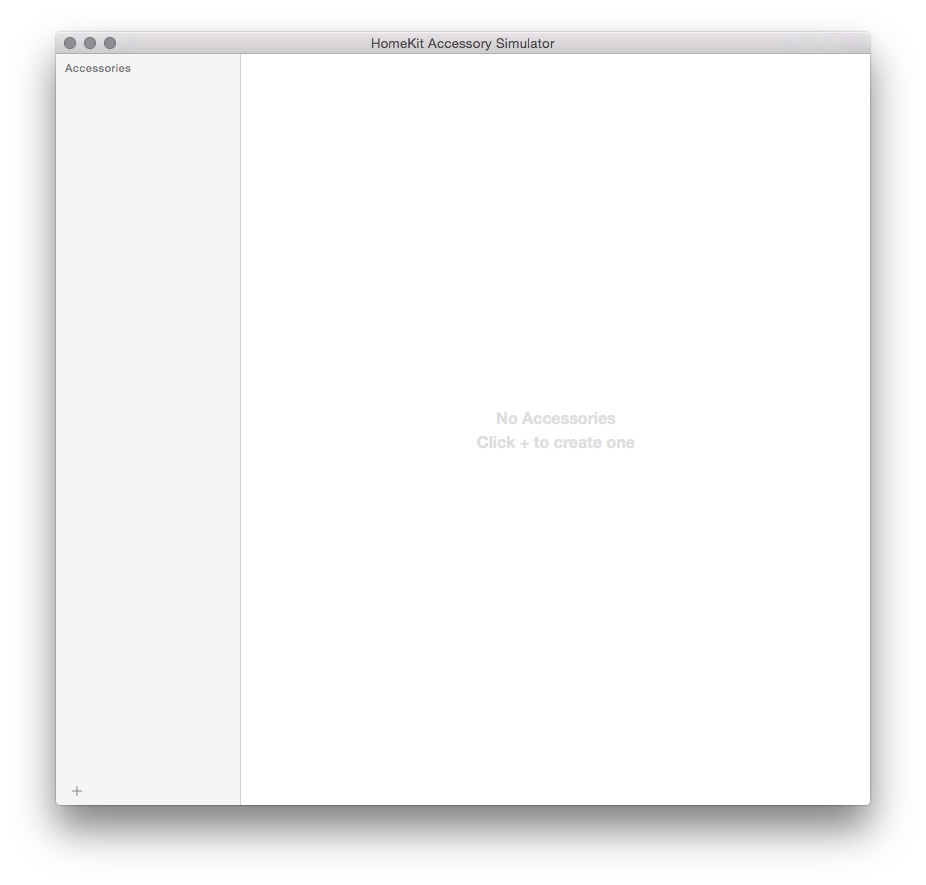
After downloading the Hardware IO tools you can move the HomeKit Accessory Simulator to your application or development folder.
![]()
When you launch the simulator you’ll see a whole lot of nothing.
Adding a new accessory is easy enough. Click the (+) button on the lower-left. A bridge is a middle-man. Instead of your app interfacing directly with the accessory, communication flows through a bridge. In this example we’re just worried about creating an accessory.
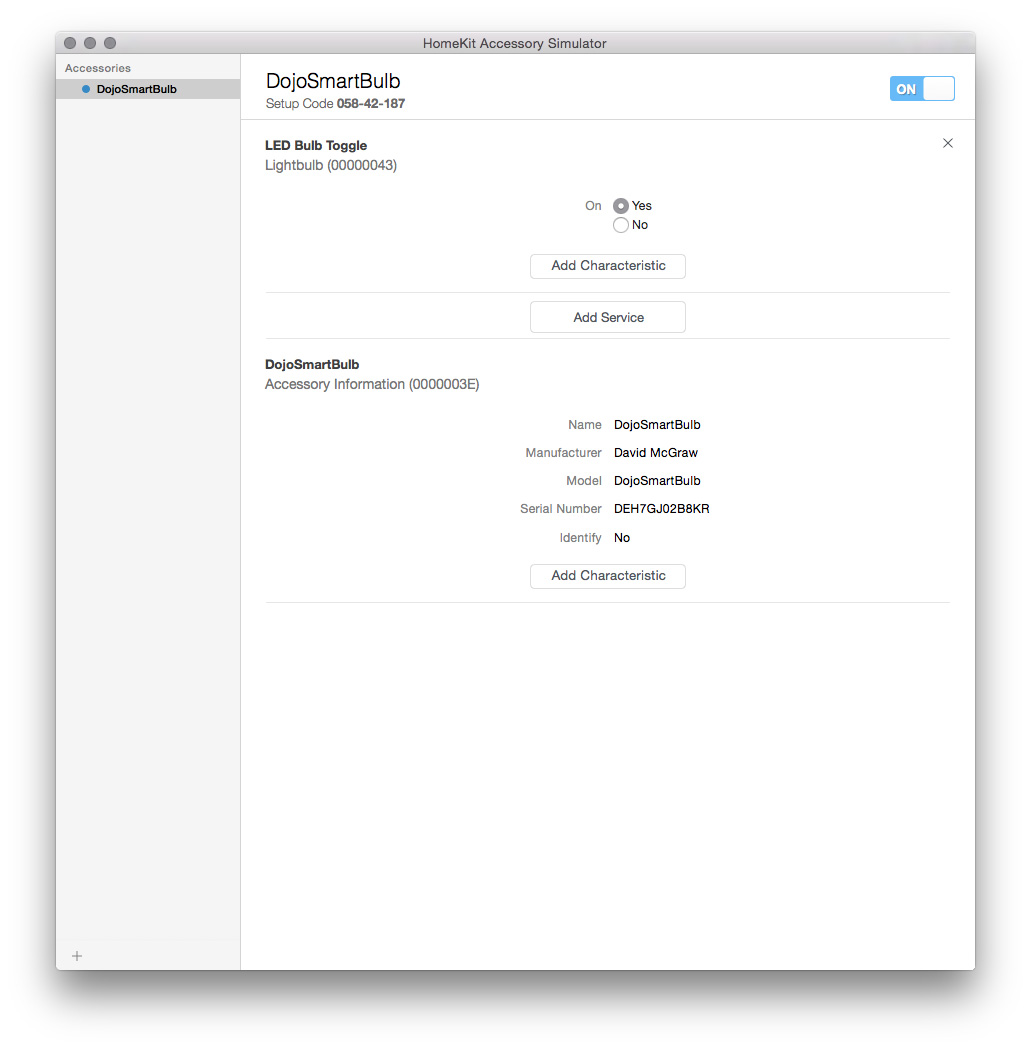
In this example I’ve kept it pretty simple. We have 2 services included in our accessory. One is a simple toggle (on or off) and is labeled internally as an EMServiceTypeLightbulb. The other is a service called EMServiceTypeAccessoryInformation. Here is a full list of supported service types:
- EMServiceTypeLightbulb
- EMServiceTypeSwitch
- EMServiceTypeThermostat
- EMServiceTypeGarageDoorOpener
- EMServiceTypeAccessoryInformation
- EMServiceTypeFan
- EMServiceTypeOutlet
- EMServiceTypeLockMechanism
- EMServiceTypeLockManagement
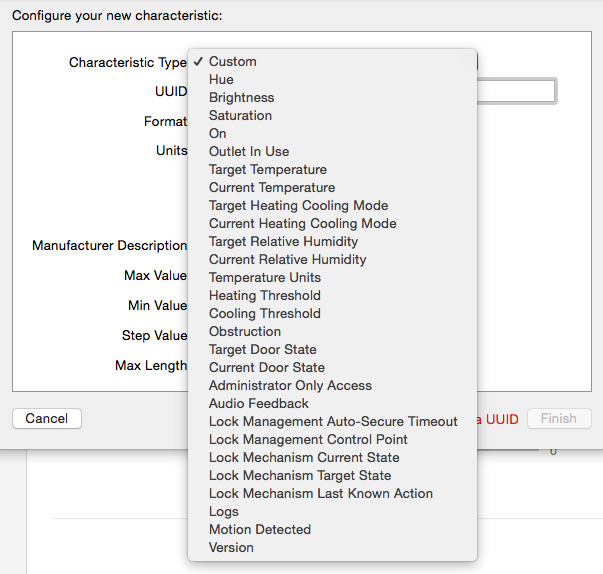
You are not forced to use the pre-defined characteristics of a service type. For example, if we pressed Add Characteristic you would see a list like such:
The Project
When you create a new project designed for HomeKit you’ll need to jump into your target capabilities section to turn on HomeKit. This will inform you again about needing the HomeKit Accessory Simulator. Once it’s enabled you’ll have the proper entitlements and framework to begin.

The Base Controller
What you don’t want to be doing is continually searching for nearby accessories. This becomes a drain on the system while wasting a lot of unnecessary cycles. You really just need to guide customers to an accessory discovery area so they can select which accessories they wish to add to their configuration.
Before we begin adding devices we initialize our home with a single room.
// Create our primary home if it doens't exist yet
private func initialHomeSetup() {
    homeManager.addHomeWithName("Porter Ave", completionHandler: { (home, error) -> Void in
        if error != nil {
            println("Something went wrong when attempting to create our home. \(error.localizedDescription)")
        } else {
            // Add a new room to our home
            home.addRoomWithName("Office", completionHandler: { (room, error) -> Void in
                if error != nil {
                    println("Something went wrong when attempting to create our room. \(error.localizedDescription)")
                } else {
                    self.updateControllerWithHome(home)
                }
            })

            // Assign this home as our primary home
            self.homeManager.updatePrimaryHome(home, completionHandler: { (error) -> Void in
                if error != nil {
                    println("Something went wrong when attempting to make this home our primary home. \(error.localizedDescription)")
                }
            })
        }
    })
}
The home manager informs us when we’ve added, removed, and updated a home. It also informs us when we’ve designated a home as our primary home.
In the code above we’re adding a new home called “Porter Ave.” You could name this whatever you’d like. In a production app you would likely hand off control to the customer to determine what name they’d like to give their home.
Once we’ve successfully created a home we add a room called ‘Office.” Again, this is something you’d likely let the customer control.
When the home and room is complete, we set the home as our primary home.
One key thing to be aware of with the home manager is that it does not immediately reveal the homes available. This is where homeManagerdidUpdateHomes: comes into play. When we launch the app this method will be called shortly after. When this happens we’ll have access to the primaryHome and homes properties.
The Discovery Controller
As I mentioned earlier, continually searching for accessories is a waste of time. So we have a controller designed just for that process. When you come into the discovery controller we immediately begin searching for new accessories with a timeout of 10 seconds. It’s as easy as creating an instance of HBAccessoryBrowser and calling startSearchingForNewAccessories. You don’t have to worry about the lower logic, you just become a delegate to catch the discovery signals.
There are two methods to the browser delegate.
// Informs us when we've located a new accessory
optional func accessoryBrowser(browser: HMAccessoryBrowser!, didFindNewAccessory accessory: HMAccessory!)
// Informs us when a device, that was previously reachable, is no longer reachable
optional func accessoryBrowser(browser: HMAccessoryBrowser!, didRemoveNewAccessory accessory: HMAccessory!)
When we discover new accessories we load them up in the table which the customer can then select to add to their configuration.
override func tableView(tableView: UITableView, didSelectRowAtIndexPath indexPath: NSIndexPath) {
    let accessory = accessories[indexPath.row] as HMAccessory

    if let room: HMRoom = homeManager.primaryHome.rooms.first as? HMRoom {
        homeManager.primaryHome.addAccessory(accessory, completionHandler: { (error) -> Void in
            if error != nil {
                println("Something went wrong when attempting to add an accessory to our home. \(error.localizedDescription)")
            } else {
                self.homeManager.primaryHome.assignAccessory(accessory, toRoom: room, completionHandler: { (error) -> Void in
                    if error != nil {
                        println("Something went wrong when attempting to add an accessory to our home. \(error.localizedDescription)")
                    } else {
                        self.navigationController?.popViewControllerAnimated(true)
                    }
                })
            }
        })
    }
}
Here you’ll see that we take the selected accessory and add it to our primary home. This will prompt the customer to enter an identification number provided by their device. In our case it’s in the simulator near the top left.

Enter the code as you see it there, including the dashes, and you’ll be good to go. When we get confirmation that the customer successfully added the accessory we can then assign it to a specific room. In the example above I assign it to the the Office we created.
The Accessory Controller
Here we drill down into the services provided by the accessory we added. As a reminder, our example provides 2 services. One is simply informational and one is a switch for a lightbulb. You can see that I don’t care about the informational services so I only load the light bulb service into a data array.
A service for an accessory contains several characteristics.
override func tableView(tableView: UITableView, cellForRowAtIndexPath indexPath: NSIndexPath) -> UITableViewCell {
    let cell = tableView.dequeueReusableCellWithIdentifier("serviceId") as UITableViewCell
    let service = data[indexPath.row] as HMService

    for item in service.characteristics {
        let characteristic = item as HMCharacteristic
        println("value \(characteristic.value) : \(characteristic.metadata)")

        let metadata = characteristic.metadata as HMCharacteristicMetadata
        if metadata.format == HMCharacteristicMetadataFormatBool {
            if characteristic.value as Bool == true {
                cell.detailTextLabel?.text = "ON"
            } else {
                cell.detailTextLabel?.text = "OFF"
            }

            characteristic.enableNotification(true, completionHandler: { (error) -> Void in
                if error != nil {
                    println("Something went wrong when enabling notification for a chracteristic. \(error.localizedDescription)")
                }
            })

        }
        else if metadata.format == HMCharacteristicMetadataFormatString {
            cell.textLabel?.text = characteristic.value as? String
        }

    }
    return cell
}
You can see that I’m parsing the characteristics of the only HMService we’ve loaded into the data array. In order to properly layout the cell we need to check the characteristic metadata for the format. There are several formats that you can check for:
- HMCharacteristicMetadataFormatBool
- HMCharacteristicMetadataFormatInt
- HMCharacteristicMetadataFormatFloat
- HMCharacteristicMetadataFormatString
- HMCharacteristicMetadataFormatArray
- HMCharacteristicMetadataFormatDictionary
- HMCharacteristicMetadataFormatUInt8
- HMCharacteristicMetadataFormatUInt16
- HMCharacteristicMetadataFormatUInt32
- HMCharacteristicMetadataFormatUInt64
- HMCharacteristicMetadataFormatData
- HMCharacteristicMetadataFormatTLV8
While the service I added didn’t have them, you can also check the metadata for unit characteristics:
- HMCharacteristicMetadataUnitsCelsius
- HMCharacteristicMetadataUnitsFahrenheit
- HMCharacteristicMetadataUnitsPercentage
- HMCharacteristicMetadataUnitsArcDegree
Again, you mainly need to do this when you want to determine what should be displayed to the customer. In my example I inspected the characteristics that came with my service and noticed that there will be a bool value (on or off) and a string value (the name of the service).
In order to monitor state changes for your device you’ll want to enable notification on the characteristic you want to monitor. In this example we care about the value changing. The delegate HMAccessoryDelegate will handle passing on the message.
func accessory(accessory: HMAccessory!, service: HMService!, didUpdateValueForCharacteristic characteristic: HMCharacteristic!) {
    println("Accessory characteristic has changed! \(characteristic.value)")
    tableView.reloadData()
}
Finally, when the customer selects are service we want to send data to the device so we can toggle it’s state. We do that by writing data to the characteristic.
override func tableView(tableView: UITableView, didSelectRowAtIndexPath indexPath: NSIndexPath) {
    tableView.deselectRowAtIndexPath(indexPath, animated: true)

    let service = data[indexPath.row] as HMService
    let characteristic = service.characteristics[0] as HMCharacteristic
    let toggleState = (characteristic.value as Bool) ? false : true
    characteristic.writeValue(NSNumber(bool: toggleState), completionHandler: { (error) -> Void in
        if error != nil {
            println("Something went wrong when attempting to update the service. \(error.localizedDescription)")
        }
        self.tableView.reloadData()
    })
}
Questions
[alert color=”blue”]Even though I delete the app from the simulator I still see accessories show up in my list. What’s going on?[/alert]
HomeKit is a global configuration system that will persist even if you delete your app. You’ll need to call the appropriate methods to delete the existing configuration or you can clear all of your settings from the simulator. Click the iOS Simulator’s main menu and then click Reset Content and Settings.
Takeaway
While there is a plenty more to cover, writing a basic HomeKit app is pretty straightforward. Having a standard protocol to work from makes the process so much more smooth. Not worrying about device discovery is very nice. Avoiding low-level communication logic is also a nice win. Grab the sample project, create your own accessory, and experiment!
[alert color=”yellow”]Enjoy the content? Consider learning more about my Discover iOS Letter![/alert]
Leave a Reply