
[alert color=”yellow”]Heads up! I have a couple of special surprises for the next Discover iOS Letter (hint: tools + savings + ???). Learn more about the letter. It’ll be in your inbox March 1st![/alert]
Time is flying! I last wrote about WatchKit when it was introduced back in November of 2014. Around the same time I started this little site of mine! If you’re one of the many returning visitors, thanks for sticking around!
Tim Cook confirmed during an earnings call in January that the Apple Watch would ship to consumers in April. If you haven’t spent any time with WatchKit it’s never to late to dive in! I’m picturing a lot of companies thinking about their iOS project in 2 lights. How can we provide a great experience on the user’s iPhone? How can we provide an complementary experience for those using the Apple Watch?
In this article we’ll explore building an iOS Spotify music player with an Apple Watch extension. You’ll be able to control the player in the iOS app and the Apple Watch extension. By the time you finish the article you’ll have great foundation for building your own experience.
- You’ll learn how to integrate the Spotify iOS SDK into your app
- You’ll learn how we can use that integration via an Extension, allowing you to pause, play, skip tracks, and view track metadata
- You’ll understand how communication can flow between an Apple Watch extension and the parent app
Important Spotify SDK Note
The Spotify SDK is currently in beta. As of this article they are at Beta 6.
If you’d like to stream audio with the example app you’ll need a Spotify Premium account. If you don’t have an account you’ll still be able to get a sense for how all of the pieces fit together between an iOS app and an Apple Watch extension.
Without Spotify Premium you can only move through the authorization process… Not that exciting? Sorry! You can TRY Spotify Premium for 30 days just by creating a new account (nope, not sponsored for saying that… though it would be nice! Love Spotify).
Getting Started
[alert color=”blue”]Download and explore the example project on Github[/alert]
To get this party started we’ll create an application with Spotify in order to get the required credential information for the SDK. Jump over to the Spotify developer area and login.
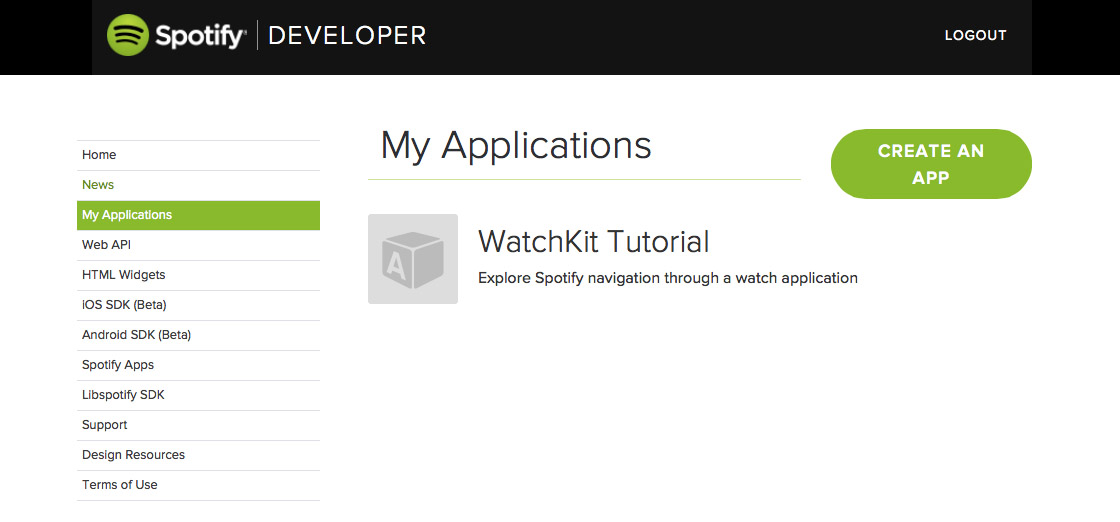
In order to create a new app you’ll click Create An App. You already see this example app in the list, let’s take a closer look.
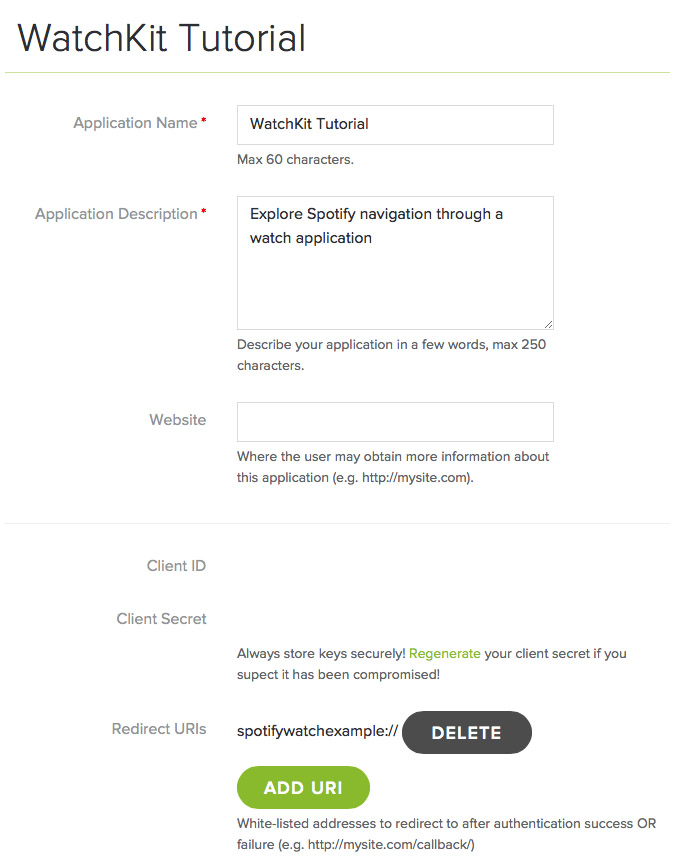
Here you’ll want to create a redirect URI to use in the iOS app. In this case I’m using spottifywatchexample://. I purposely removed the Client ID and Client Secret from the image, but you should see those when you create the app.
The iOS App
Now that we have an application created with Spotify we can begin working on the iOS app. Here is what we’re building.


We’ve kept it pretty basic for this example. You’ll be able to authorize with Spotify and play a preset album that I’ve added to the project. We’ll then fetch metadata for the track and display it.
Download & Integrate The Spotify SDK
In order to integrate Spotify you’ll have to download the latest version of their SDK from their Github page. Unzip that file and you’ll be able to add Spotify.framework to your project. You’ll also need to link against AVFoundation.framework.If you’re not already linking to -ObjC, you’ll want to add that under your Build Settings. Search for Other Linker Flags and add it there.
From there we add a URL Scheme so Spotify can open our app when it’s done authorizing the user. You can see this under the dojo-apple-watch target. Select Info and expand URL Types.

In the image above you can see that spotifywatchexample matches the name we provided when we created our app on Spotify.
Token Exchange Service
In order for the Spotify SDK to complete the authorization process it uses a small HTTP service called a token exchange service. You’ll see this in the demo project that was included in the Spotify SDK download. Open spotify_token_swap.rb and you’ll see CLIENT_ID, CLIENT_SECRET, CLIENT_CALLBACK_URL. You’ll want to replace those values with the values from your own app that you created with Spotify.
Once those values are in place you can run the script from Terminal by calling ruby spotify_token_swap.rb. If you don’t have sinatra and/or encrypted_strings you’ll need to call sudo gem install sinatra encrypted_strings before running the script.
When the service is available you’ll reach the swap endpoint at http://localhost:1234/swap and the refresh endpoint at http://localhost:1234/refresh. The refresh endpoint is how we’ll refresh an existing session that has expired.
Authentication
When the app first launches it’ll check to see if we have a valid SPTSession object. If the session object exists, it may have expired, forcing us to authorize. Otherwise, if it hasn’t expired, we can renew our session.
// If we have a valid session then we can login
if XMCSpotifyPlayer.sharedPlayer.isAuthenticated() {
    attemptLogin()
} else {
    // If not, try to renew our session
    XMCSpotifyPlayer.sharedPlayer.renewSession({ (success) in
        if success {
            self.attemptLogin()
        } else {
            // The user needs to go through the authentication process
        }
    })
}
If this is the first time authenticating the session object won’t exist at all so you’ll need to go through the login flow to authorize. Once Spotify auth returns to our app we can archive the session object away for future reference.
func application(application: UIApplication, openURL url: NSURL, sourceApplication: String?, annotation: AnyObject?) -> Bool {
    if SPTAuth.defaultInstance().canHandleURL(url, withDeclaredRedirectURL: NSURL(string: kCallbackURL)) {
        SPTAuth.defaultInstance().handleAuthCallbackWithTriggeredAuthURL(url, tokenSwapServiceEndpointAtURL: NSURL(string: kTokenSwapUrl), callback: { (error, session) in
                if error != nil {
                    println("Authorization Error: \(error.localizedDescription)")
                } else {
                    // Store our session away for future usage
                    let sessionData = NSKeyedArchiver.archivedDataWithRootObject(session)
                    NSUserDefaults.standardUserDefaults().setObject(sessionData, forKey: kSessionObjectDefaultsKey)
                    NSUserDefaults.standardUserDefaults().synchronize()

                    // Update our shared player
                    XMCSpotifyPlayer.sharedPlayer.session = session

                    // Notifiy our main interface
                    NSNotificationCenter.defaultCenter().postNotificationName(kSessionWasUpdated, object: session)
                }
            })
        }
    return false
}
Once we have a valid session we can login to the service.
func loginSession(#playbackDelegate: SPTAudioStreamingPlaybackDelegate?, delegate: SPTAudioStreamingDelegate?, completed: (success: Bool) -> Void) {
    assert(session != nil, "Don't call login if a session hasn't been created!")

    player = SPTAudioStreamingController(clientId: kClientId)
    player?.playbackDelegate = (playbackDelegate != nil) ? playbackDelegate : self
    player?.delegate = (delegate != nil) ? delegate : self
    player?.loginWithSession(session, callback: { (error) in
        if error != nil {
            println("Enabling playback failed: \(error.localizedDescription)")
            completed(success: false)
        } else {
            completed(success: true)
        }
    })
}
Playing Audio
The Spotify SDK will let you play an individual track, album, or a playlist. In this example we’re going to request an album. Once we have that album we’re going to queue it up for playing.
func queueDefaultAlbum(completed: (success: Bool) -> Void) {
        SPTRequest.requestItemAtURI(NSURL(string: "spotify:album:1ZuyuaB3hzsew72bxgCv5E"), withSession: session, callback: { (error, album) in
            if error != nil {
                completed(success: false)
            } else {
                self.player?.queueTrackProvider(album as SPTAlbum, clearQueue: true, callback: { (error) in
                if error != nil {
                    println("Couldn't queue tracks: \(error.localizedDescription)")
                    completed(success: false)
                } else {
                    completed(success: true)
                }

                // Don't start immediately
                self.stopPlayer()
            })
        }
    })
}
From there we have access to a few methods available on a SPTAudioStreamingController object. You can read about several more over on the documentation.
- skipNext : Moves to the next track
- skipPrevious : Moves to the previous track (note: during my testing this actually cut off audio)
- queuePlay : Begins playing back the queued items
- stop : Stops playback and clears the queue
Track Metadata
When you begin playing a track your streaming object will contain a currentTrackMetadata property that will tell you about the track. The dictionary includes several valuable keys:
- SPTAudioStreamingMetadataTrackName : Track name
- SPTAudioStreamingMetadataTrackURI : Track URI on Spotify
- SPTAudioStreamingMetadataArtistName : Artist’s name
- SPTAudioStreamingMetadataArtistURI : Artist URI on Spotify
- SPTAudioStreamingMetadataAlbumName : Album name
- SPTAudioStreamingMetadataAlbumURI : Album URI on Spotify
- SPTAudioStreamingMetadataTrackDuration : Track duration as an NSTimeInterval boxed in an NSNumber
In the example we’re taking advantage of the track name and duration. How do we get the album cover image? First you’ll need to grab the album from the URI provided, and then you’ll be able to get a URL to the cover. In the example app we refresh this when a track begins playing.
func getAlbumArtForCurrentTrack(largestCover: Bool, completed: (image: UIImage?) -> Void) {
    getAlbumArtDataContent(largestCover, completed: { (data) in
        dispatch_async(dispatch_get_main_queue()) {
            if data != nil {
                completed(image: UIImage(data: data!))
            } else {
                completed(image: nil)
            }
        }
    })
}

private func getAlbumArtDataContent(largestCover: Bool, completed: (data: NSData?) -> Void) {
    if player?.currentTrackMetadata == nil {
        completed(data: nil)
    } else {
        let albumUri = player?.currentTrackMetadata[SPTAudioStreamingMetadataAlbumURI] as String
        SPTAlbum.albumWithURI(NSURL(string: albumUri), session: session, callback: { (error, obj) in
            if error != nil {
                println("Something went wrong when trying get the album: \(error.localizedDescription)")
                completed(data: nil)
            } else {
                let album = obj as SPTAlbum
                var imagePath: NSURL?
                if largestCover {
                    imagePath = album.largestCover.imageURL
                } else {
                    imagePath = album.smallestCover.imageURL
                }

                if let path = imagePath {
                    // Jump into the background to get the image
                    dispatch_async(dispatch_get_global_queue(DISPATCH_QUEUE_PRIORITY_DEFAULT, 0)) {
                        if let data = NSData(contentsOfURL: path) {
                            completed(data: data)
                        }
                    }
                }
            }
        })
    }
}
The Apple Watch Extension
As a reminder, the Apple Watch is a fairly limited device. It must take advantage of an existing connection with an iPhone to exchange and update data.
That said, this will change in future version where we’ll likely see native running watch apps. For now, however, that means our Apple Watch app is no more than a window into the iOS app sitting in our pocket. Not all is lost! This still makes for a fair amount of valuable use cases for those who own both devices.
In our case, we’re already listening to a Spotify track on our iPhone. Say we’re out on a run. Instead of reaching for the iPhone in your pocket or on your shoulder you could flip over your wrist to display a quick window into the app. That’s exactly what we’re doing here. You can open up our extension and transmit commands to the iOS app.
When your extension needs to contact the iOS app we can call openParentApplication from the WKInterfaceController class. In our case this is all we’re doing in our extension. We’re transmitting commands to the iOS app to trigger our audio player. In the simulator this works well, but I’m curious to see how it works with live devices.
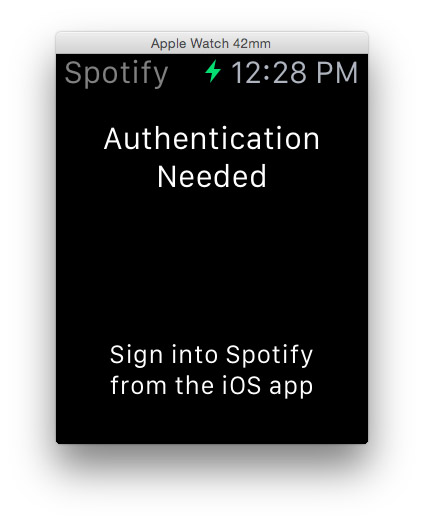
When openParentApplication is called we provide a dictionary that the iOS app can then example. For example, we call to the iOS app when our extension launches in order to verify we’re authenticated. If we’re not authenticated we need to inform the user that they need to.
// Extension: Call the parent iOS app
WKInterfaceController.openParentApplication(["trigger" :"auth"], reply: { (replyInfo, error) in
    if let value = replyInfo["value"] as? String {
        if value == "true" {
            self.performLogin()
        } else {
            self.authGroup.setHidden(false)
            self.playerGroup.setHidden(true)
        }
    }
})

// iOS App: Handle incoming request and provide a reply
func application(application: UIApplication!, handleWatchKitExtensionRequest userInfo: [NSObject : AnyObject]!, reply: (([NSObject : AnyObject]!) -> Void)!) {
let trigger = userInfo["trigger"] as String
    if trigger == "auth" {
        let value = XMCSpotifyPlayer.sharedPlayer.isAuthenticated()
        if value == false {
            reply(["value": "false"])
        } else {
            reply(["value": "true"])
        }
    }
    // … (lots of other code removed, review the AppDelegate.swift from the repository)
}
We check our model object and fire a response back to the extension.
Here is our flow when the extension is launched:
- Check that we have an authorized session object
- Perform login
- Add our album to the queue
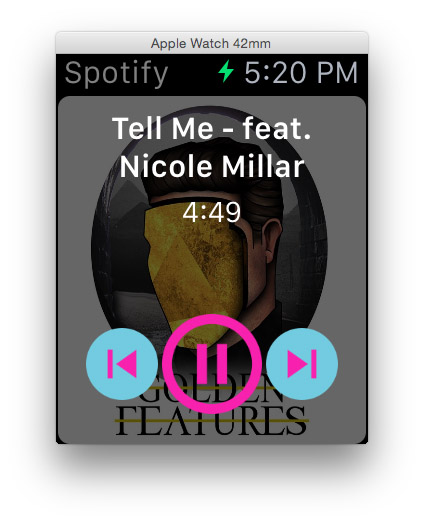
Once the user taps play in the extension:
- Begin playing the queue
- Fetch metadata (title, duration)
- Fetch album artwork
Ideally this would include a step that simply checks the iOS app to see if a track is currently playing. If so, display metadata and open up control to pause and skip tracks. At the moment that interaction is difficult to test because of the way the simulators work. Having an iOS app and an extension active at the same time doesn’t work right now. So, for now, I’ve just made the watch perform the same actions as the iOS app.
When we go to fetch the album cover from the extension we’ll pass through the same code block as before, but we’ll do 2 things differently.
- We’ll fetch the smaller album cover so we’re not transmitting so much data
- We’ll skip converting the data object to a UIImage (the extension can handle that)
If you haven’t explored the example app I encourage you to do so in order to see how all of this looks in practice.
Takeaway
Creating an Apple Watch app can be a great way to encourage more user engagement. Making things much easier is a simple recipe for sticking out in the mind. Find a way to compliment an existing app and explore WatchKit a little more next weekend!
Leave a Reply