
When it comes to iOS development tools there is one that every iOS developer is intimately familiar with. Xcode is the driving force that makes all of the amazing iOS apps possible.
What is less-than-comforting—especially to newcomers—is the sheer amount of things that Xcode can help us do. To those new in this area Xcode can feel incredibly overwhelming. To those with years of Xcode experience still find themselves learning little details that improve their productivity. My message to those new to this space is to not drown yourself out by learning everything there is to know about Xcode. Focus on the important elements that matter today and let your experience guide you to new areas of the tool.
In this article I’m going to cover several elements of Xcode that will help increase your productivity. A few of the things we’ll cover are a set it and forget it, while others aim to reduce daily headaches.
- You’ll learn how to customize Xcode to improve your productivity
- You’ll learn a few features of Xcode that will help manage your code
- You’ll learn a few tips that will help your overall project development
Xcode Behaviors
Behaviors are an amazing way to automatically have Xcode perform actions based on your actions. Imagine if you are running your project and hit a breakpoint or error. By default Xcode will automatically open the debugger windows, navigate to the code in error, and completely throw your editor out of sync. Let’s explore creating a new behavior to stop that from happening.
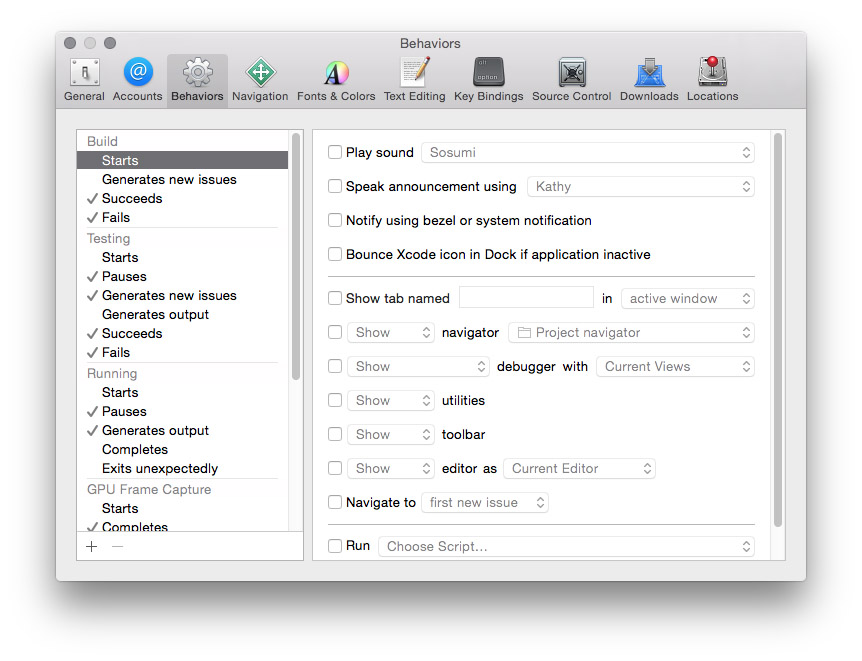
Navigate to Xcode Preferences and you’ll see a tab called Behaviors. Here we can define what happens when we experience various state changes. What happens when a build start? What happens if it succeeds or fails? You can have Xcode play a sound, open new tabs, show navigators, and much more.
For this example, we want to perform behaviors when our app is running. When the app pauses, due to a breakpoint or error, we would like to do the following:
- Play a sound (Hero sounds good to me, but you can switch it to something else—including custom)
- Show a new tab called debug
- Show the debug navigator
- Show the debugger with Variables & Console

The reason I want this behavior to open a new tab is that I don’t want Xcode to step on my current working state. I can easily switch back to where I was coding with my source file and cursor where it should be. I’m also not closing a bunch of panes that Xcode opened for debugging. That entire experience is focused inside of a separate tab.
Take some time to explore the possible behaviors to fit your own development style. You may find that certain things happen by default to be annoying. This is how you could possibly turn that off.
Manage Devices & Simulators
Have you ever wondered if you can manage the device list that shows up in the Xcode device drop down?
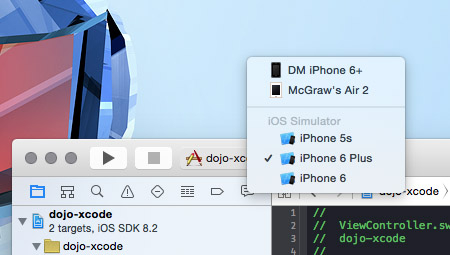
How about accessing that database you have on your device so you can verify tables populated properly? Have you ever opened that drop down and noticed that Xcode lost all of your simulators? Navigate to Window > Devices.
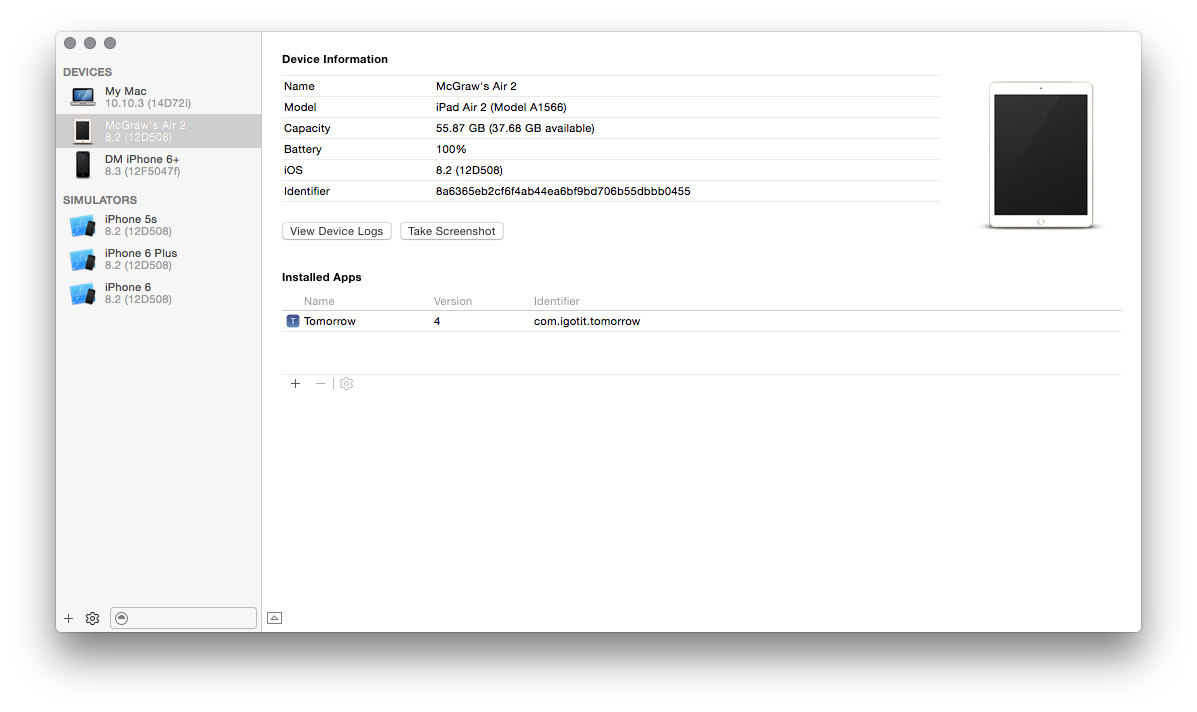
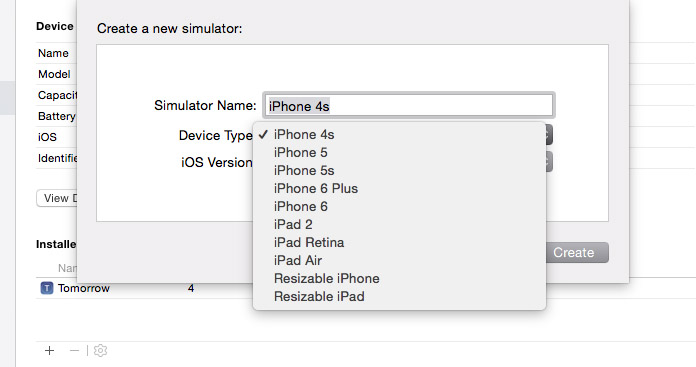
Here you can see our connected devices and available simulators. If you need to add or remove simulators press the + button on the lower left. As a warning, Xcode likes to lose simulators so you’d restore them by visiting this area.
Finally, one other useful thing in this area is the ability to download app containers.
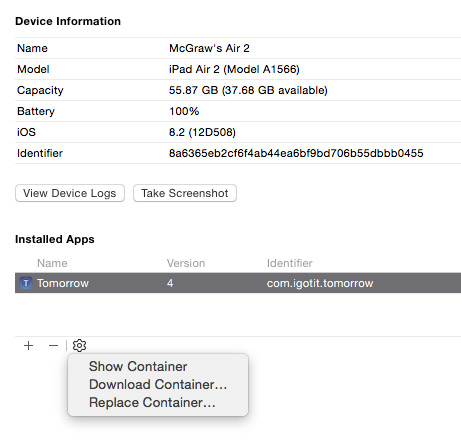
You’re probably used to accessing data through the simulator directories, but what about the device? You can sense how useful it would be to easily access saved photos, database files, etc. To access that data on the device you can download a container containing the documents, library, and tmp directories.
Update App Display Name
One common issue folks run into is that they create a project only to find out that your display name isn’t what you want. I’ll often see people renaming and refactoring their entire project name to show the proper display name. You’ll be happy to know that there is a key you can add to your project info plist. Add a new key Bundle display name.

Improve Readability & Extend Xcode
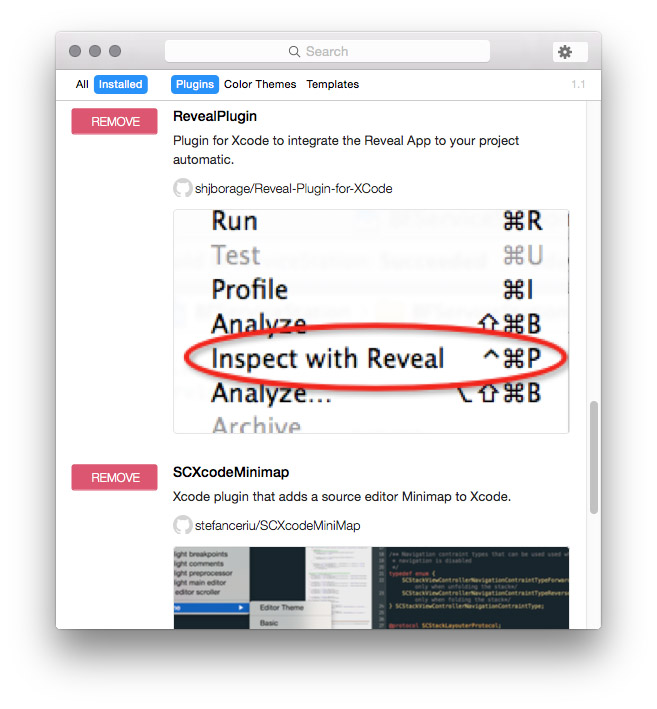
There are some great plugins available for Xcode that provide a boost to productivity. Folks are even creating very nice custom themes that replace the default presentation of Xcode. Because, let’s be honest, the default theme is painful. So how can we more easily discover what is available? Make the jump over to alcatraz.io to install a very nice package manager for Xcode.
Here are a few that I currently use:
- SCXcodeMinimap : This may look familiar from your Sublime Text usage! Easily see and scroll through your code
- RevealPlugin : If you use Reveal this is a great way to hook into and launch Reveal
- RealmPlugin : Realm model object template file
- VVDocumenter-Xcode : Helps to quickly generate comments for a method
- AdjustFontSize : When showing code off you may want to quickly increase font size, simply use CMD +/- with this plugin
- Lin : Shows code-completion for NSLocalizedString
A localization plugin under development, Rephrase, is worth watching. This looks like it will be a great time saver once it’s launched.
My current theme is Dusk, which is a default theme I believe. There are a lot of color themes you can download via Alcatraz to explore.
Download Documentation and Older Simulators
When you install a new version of Xcode you may notice that you don’t have simulators available for older iOS versions. This can be a problem when it comes to testing. You can install these through the preferences download area.
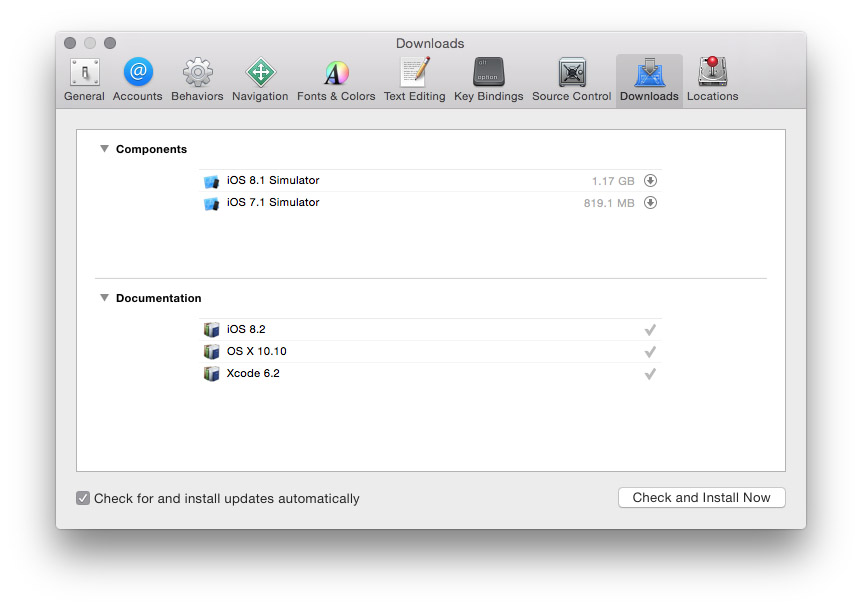
Here you can download the older simulators and manage them through Window > Devices. You also have access to documentation that doesn’t come pre-loaded with Xcode.
Organize Source Files
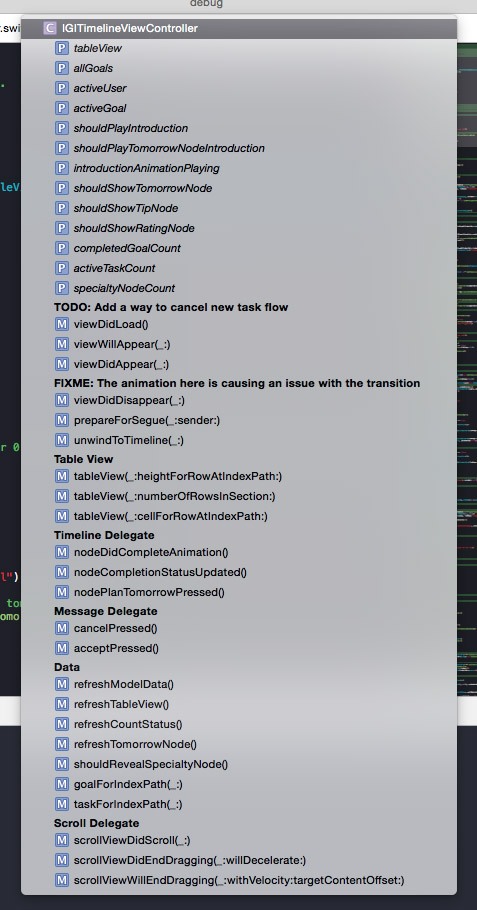
When navigating a source file you can access all of the properties and methods via a drop down above the source file.

When you click the above area a drop down will appear revealing details about that file. Within your source code you can leave markers such as // FIXME: or // TODO: or // MARK:.
Quick Open Files
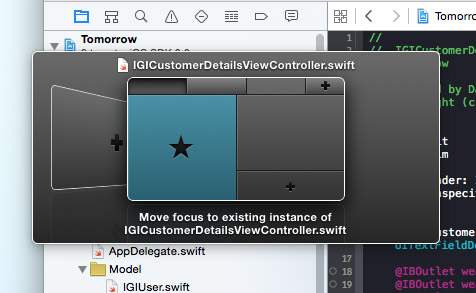
You may find yourself needing to open a new file, but wanting to keep your current file open at the same time. There are a few ways to do this.
You could open your assistant editor and switch files from there. Go to View > Assistant Editor > Show Assistant Editor.
You could double-click on the file you wish to open. This will quickly open a separate window entirely.
You can have a little more flexibility by pressing Option + Shift + Click. This will pop up a useful window that lets you choose where to open the file.
Jump To Definition
Being able to quickly jump to the documentation you’re working with is a time saver. You may be working with a UITableViewDelegate and forget all of the methods associated with it. You can quickly jump to a symbol by pressing Command + Click.
Documentation Generation
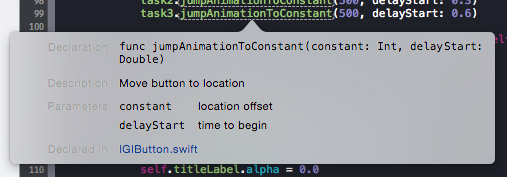
Instead of manually typing out comment blocks download and install the plugin VVDocumenter-Xcode. This will let you quickly generate comments by just typing three slashes (///).
The side benefit from doing this is that Xcode will use these comments to show preview documentation of the method. By pressing Option + Click on the method you’ll see a documentation quick look.
Creating Code Snippets
Code snippets are extremely valuable where you see yourself routinely typing the exact same format over-and-over again. For example, I have snippets that automatically fill out a new table or collection class with the delegate methods I care about. I also have smaller snippets that help me quickly create typealias, singleton, gdc calls, and others.
To create a snippet open the snippet panel from the file inspector.
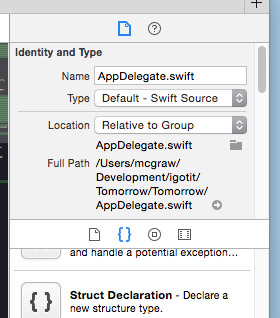
You’ll type out the code you wish to create a snippet from. An important note that if you need placeholders you’ll type <#placeholder-name#>. You’ll then click, hold for a second, then drag the code into the snippet area.
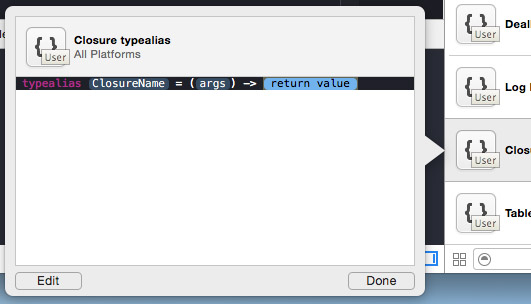
You’ll then be able to edit the snippet to add more details. The most important detail would be the Completion Shortcut. This will be the keyword you type in your editor to be able to use it. Alternatively, you can click + drag the snippet out of the snippet area.
One of these days I’ll gather up all of my snippets and share them.
Enhanced Debugging With Chisel
Facebook built a collection of LLDB commands to help make debugging a little more enjoyable. If you don’t have these take the time to jump to Github to install them. To give you a sense of what this provides here is a list of a few favorite commands. These commands save a ton of time and brain power trying to remember the syntax.
- views : print the recursive view description for the key window
- visualize : open a UIImage, CGImageRef, UIView, or CALayer in Preview.app on your Mac
- show/hide : show or hide the given view or layer
- border/unborder : show or hide a border to a view or layer to visualize where it is
There is a lot more to chisel so jump into lldb and type help to review a list of user-defined commands.
Version Editor
If you quickly need to check what all you’ve changed in a file you can take advantage of the built in version editor instead of messing with Git.
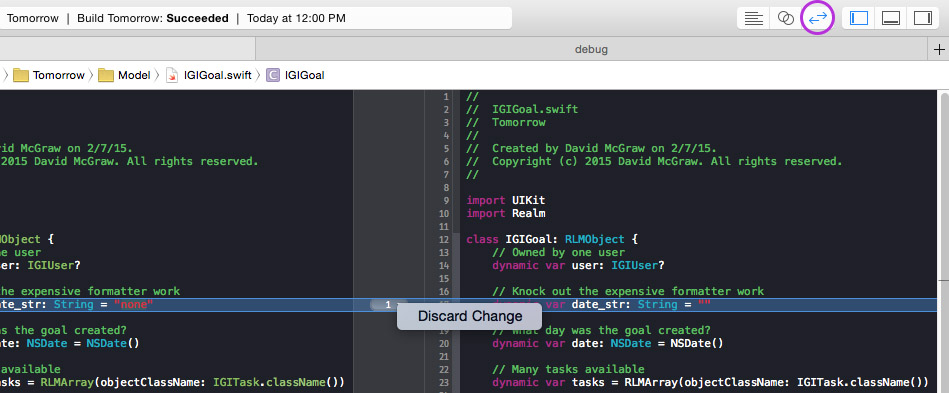
You can quickly open the version editor by pressing the arrows on the top-right of the window or going to View > Version Editor > Show Version Editor. You could imagine having a lot more test code that you have no desire to commit. The version editor will show those changes while allowing you to quickly discard them. You could clearly use your source control UI to do this, but this is easy enough.
6 Key Commands Worth Memorizing & Setting
Some of these commands are not set by default, but I encourage you to open Preferences > Key Bindings to modify them as needed.
- Command + / : comment/uncomment code
- Command + [ or ] : indent/unindent code
- Command + Left/Right Arrow : navigate to the beginning or end of line
- Control + s : select word
- Option + Command + e : edit the selected word based on the current scope
- Option + Left/Right Arrow : navigate words
- esc : bring up possible auto-completion choices
There are many, many more key commands. Find the commands that fit your style and roll with it.
Takeaway
In article we covered several practical bits of information related to tool you’ll use the most—Xcode. Much of what I’ve showed here are things that I constant take advantage of to improve my productivity. I don’t strive to be recklessly fast (you won’t see me only using a keyboard), but I do strive to spare myself repeated headaches. As you gain more experience you’ll find what works best for you. That’s the key. Soak in what you will from this article and apply it to your own process.
Leave a Reply